How to Maintain and Restore a Deck Showing Uneven Wear
[blockquote] Remember the ‘Early Bird Gets the Worm’ phrase? Well, that applies to proactive deck maintenance, as well. Proactive deck maintenance before wear and tear is visible leads to a much easier and enjoyable experience. [/blockquote]
No matter what kind of wood you’ve chosen for your deck, all decking requires a maintenance coat of finish to maintain beauty and the highest level of protection.
In most cases, a simple water bead test will show if it’s time for maintenance. However, the wear on a deck is often uneven, and differentiation in wear becomes clearly visible when timely maintenance is not done.
Some areas wearing faster than others could be due to preparation or application inconsistencies, variation in wood quality or uneven wear due to foot traffic, excessive wetting or design issues.
Issues that Impact the Maintenance Cycle
It’s important to inspect the surface carefully from time to time and look for even the smallest signs that maintenance is needed. For example, a deck may have a high traffic area that leads from the back door to a pool or a much-used lawn area. Alternatively, perhaps a couple of areas see excessive wetting from sprinklers.
Other design issues might cause trouble. Downspouts or a clogged evestrough (gutter) can cause a waterfall to constantly pour water onto an area of the deck during times of precipitation. Other areas may get more wear from higher than normal exposure to rain, snow, sun or foot traffic.
Remember, excessive wetting (moisture) is much more problematic than UV exposure. Wetting causes the wood to swell and then shrink while drying. From this natural expansion and retraction, little cracks will form as the wood cycles through these extreme conditions. This causes the wood to discolor and the coatings to wear prematurely. Designing the landscape and roof drainage to avoid excessive wetting can help reduce these extremes and extend maintenance cycles.
The following deck maintenance example shows how to both restore and maintain areas on the same deck that show uneven wear.
Deck Situation: A southwest facing, 1,200 square foot cedar deck in London, Ontario, Canada, was finished with one coat of Sansin Dec in Espresso and one coat of SDF Topcoat (with reduced Espresso tint) in April 2016.
Sansin’s Dec product is a penetrating finish that works well for wetter wood situations. Normally, Dec is a 2-coat system. However, in this instance, the owner wanted a harder, fuller finish and therefore, selected SDF Topcoat as the second coat.
This deck ranges from sitting on ground level to a maximum clearance of 12” from ground level. London, Ontario, is considered an extreme climate for decks due to the severe range in temperatures. It lies at the southern latitude of 42.5 degrees, which brings large seasonal temperature and climate contrasts. Furthermore, its proximity to the Great Lakes means it is exposed to lake effect moisture and snow squalls.
Maintenance Inspection:
After two years, in April 2018, the decked looked to be in good shape. But, after more thorough, careful examination, a small area along the garden – where the sprinkler wets about three feet in on a daily basis – small checks (cracks) were noticed. It was clear by May of 2018 that a simple maintenance coat would be necessary to protect these newly opened surfaces.
As it turned out, to the owner’s regret, they did not get to the maintenance of the deck until September of 2018. That meant the deck was into a third season of sprinkler wear and tear.
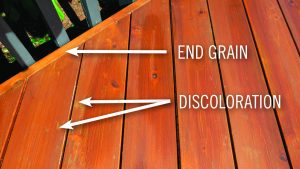
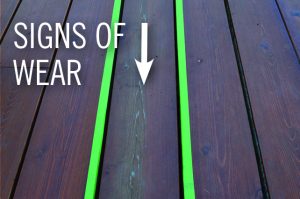
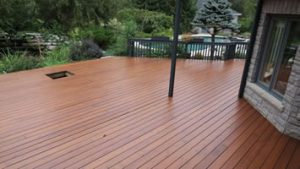
While 95% of the surface still looked great, the area that was wetted daily had started to discolor around the tiny checks. Also, the areas near the end grain were showing signs of moisture intrusion and swelling and contraction. (See Photo 1)
Had the owner maintained the deck in Spring of 2018, then a maintenance coat would have been sufficient. Waiting just four months longer caused two areas to need more corrective treatment, turning a half-day job into a two-day job.
The plan now was to both 1) correct the high wear areas that were left too long, 2) and maintain the other areas with the normal maintenance coat using SDF Topcoat.
[row]
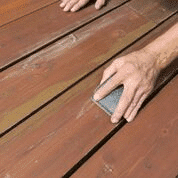
Step One – Clean Deck and Prep Surfaces
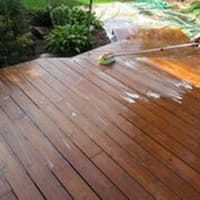
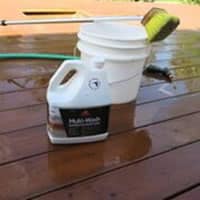
For maintenance coat preparation, the owner used Sansin Multiwash. You can apply Multiwash with a scrub brush. Once the cleaner has been applied for the recommended period of time, rinse off the deck with a hose. Use a lot of water, but then let the deck dry thoroughly. (See Photos 2 and 3)
[/row]
[row]
Step Two – Corrective Action on Worn Spots
Before putting a maintenance coat over the entire surface, the owner identified cedar planks that were showing more wear on spots from foot traffic, little cracks from excessive moisture (swelling and contraction) or insufficient coating.
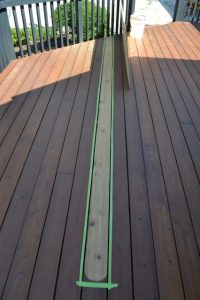
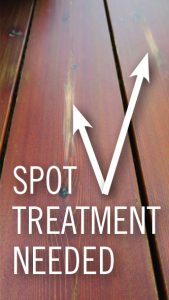
For example, in photo #4, the owner decided to redo a board that showed signs of wear down the middle of the wood. The grayer wood and slight yellowing show that insufficient coating was applied. This can be due to improper preparation or application, or sometimes a board can be of poorer quality and wear faster. In this instance, the owner can’t spot treat, but will instead sand the board down to bare wood with 60-80 grit paper (Photo #5) and refinish that board with Dec and SDF Topcoat.
[row/]
Once the entire deck is topcoated, you won’t be able to see the board that was entirely redone. (Photo #6)
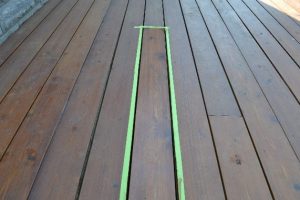
On other areas, a spot treatment was necessary. One area was damaged by a sprinkler that drenched certain boards, leading to discoloration and calcium deposits from water pooling. (Photo #7)
[/row]
[row]
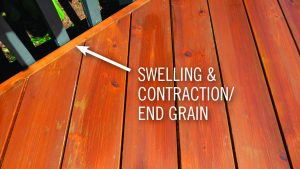
Another area that was hit the most by the sprinkler, showed specific wear and tear at the end grain. The end grain of wood (longitudinal end) absorbs moisture more than twenty times than perpendicular to the grain. When excessive moisture hits the end of wood, swelling and contraction reduces coating performance. Photo #8
[/row]
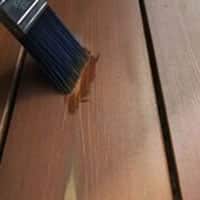
Photo #10
After carefully sanding the specific spots with 60-80 grit sandpaper (Photo #9 , the owner applied the Dec Espresso stain directly to those bare areas with a China bristle brush (Photo #10).
The owner let the product stand wet and soak into the bare wood because applying to the point of refusal would match the color with the previous applied products.
After letting it sit, they brushed away the excess product, leaving about 4-5 wet mil of Dec remaining. They were careful to wipe product away from the intact coating around the bare spot.
The newly stained, spot areas were scuff sanded (220 grit) to prepare for the second spot coat of SDF Topcoat with reduced Espresso. This coat was applied in a similar way to the first, but allowed to blend in to the surrounding, intact coating area.
[row]
Step Three –
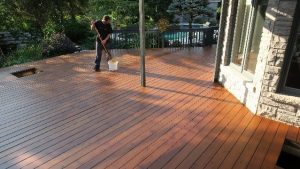
Now that the corrective staining was complete, the owner was ready to apply SDF Topcoat to the entire deck. SDF Topcoat was applied with a garden sprayer? and then back-brushed. (Photos #11 and #12)
[/row]
[row]
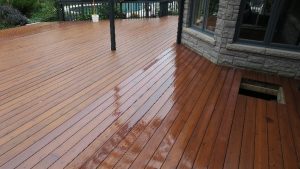
Results and Looking Ahead
The completed cedar deck is now ready for two or more years of protection. The owner should now be more careful about ensuring the sprinkler system does not hit parts of the deck leading to faster wear – and keeping the gutters clean.
The owner will also apply a maintenance coat before more serious corrective action is needed. As the example showed above, waiting one season too long can make all the difference.
[/row]